][ said:
What the heck is a “Flight Roof” and how do I do make it?[/u]
On maps that allow use of the flying vehicles – you need to place a cover at the highest elevation you want to allow them to fly to. If you don’t – they will go too high – and the map below will go bye-bye.
Procedure for a flight roof is to make a small plane – that covers the entire top of the map – set the W3D options to physical and vehicle – and hide.
Now your users won’t fly to high (you can use a plane – but the normal face must be facing down toward the ground – so flip it)
If you don't already know where to find all that stuff, here's a tutorial on it:
Making Invisible Barriers
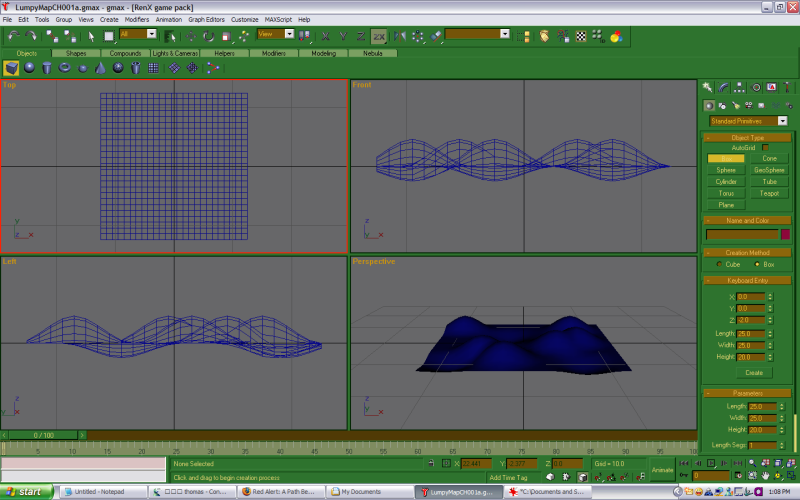
Here's your map.
The first step is to make an object in the shape of the barrier you want. In this case I've used a box:
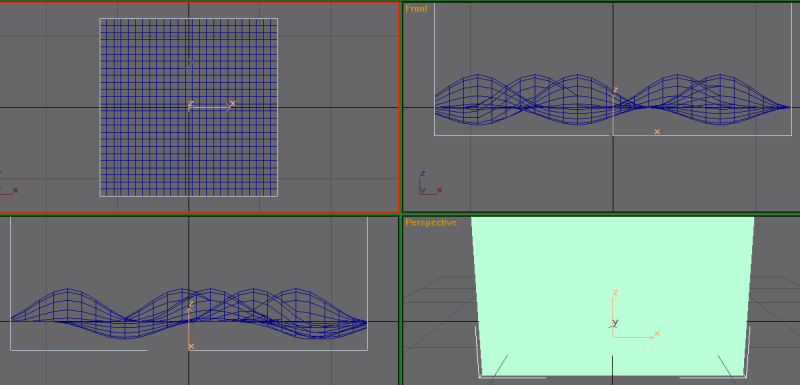
As you can see, I have the edges of the box meet the edges of the map. What this translates to is that the players won't be able to get past the edge of the map; normally you would have the edge of the map outside the barrier so that it gives the effect of being in a much larger place (the key thing to remember is that the map should look like there's much more to it than there really is). I've also made sure that the edges of the box go below the map.
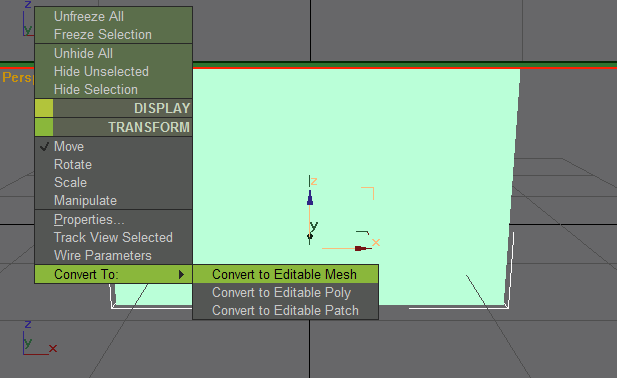
The next step is to convert the box to an Editable Mesh. To do this, make sure you have the box selected and right click somewhere in whichever view port you have active (you'll know which view port is active because it will have a red border around it:
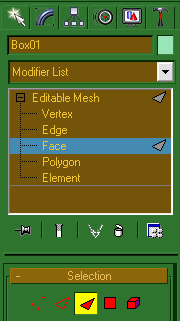
On the right, go to the "Modify" tab (second from the left, looks like a quarter of a blue donut) and click on the little plus sign next to where it says "Editable Mesh".
Now click on either where it says "Face" or on the red triangle in the middle of the five icons:
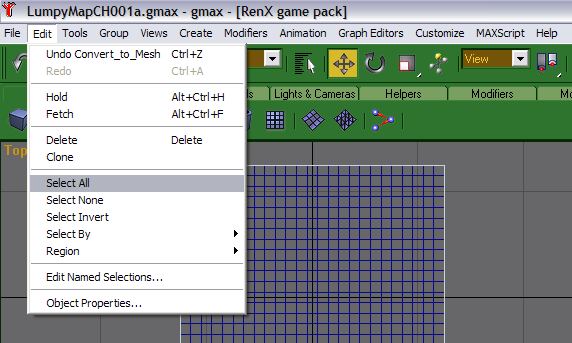
Go to the Edit menu and click "Select All":
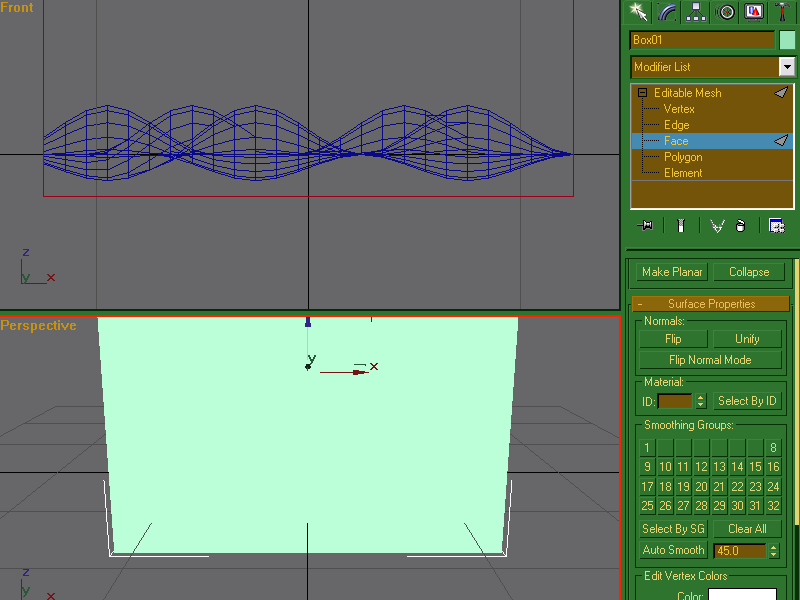
On the right, scroll down to the "Surface Properties" section:
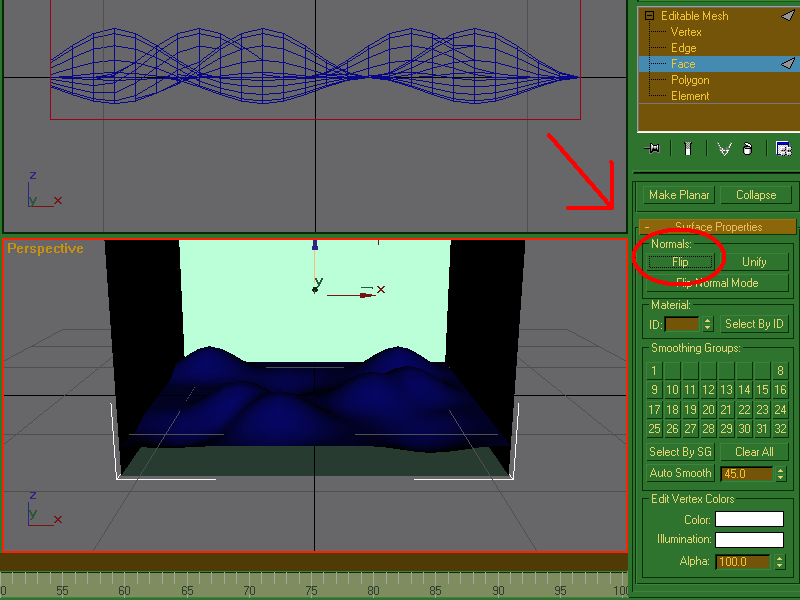
Click the "Flip" button in the "Normals" subsection. This will invert the selected faces of the box/whatever-object-you-used. If you have followed the steps correctly, you should now be able to see into the box; this is because in RenX you can only see a face on the side its normal is facing:
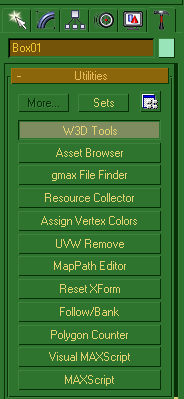
Back to the right, click the "Utilities" tab (looks like a hammer) and click "W3D Tools":
Scroll down to the "W3D Export Settings" section and check "Hide" and "Physical". Hide will make it invisible in game and Physical will make it so that Infantry and Vehicles can't pass through it.
I've indicated with red dots where "Hide" and "Physical" can be found:
http://i104.photobucket.com/albums/m165/My...ysVehicle_c.png
You can, of course, use any object whether it's a plane, a box, or whatever and change it to whatever shape best fits the area you need blocked. For vehicle blockers, just do what you would normally do for an invisible barrier except click vehicle and not physical (usefull for keeping vehicles from getting stuck in narrow passageways.
Edited by Revantheemperor, 03 November 2007 - 13:49.


