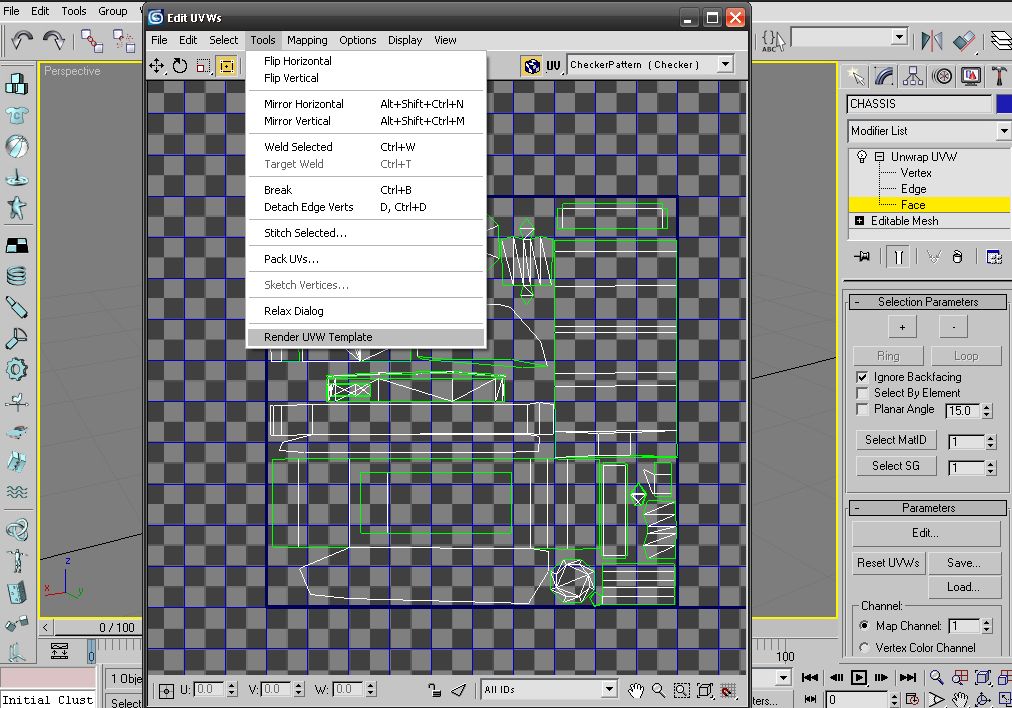
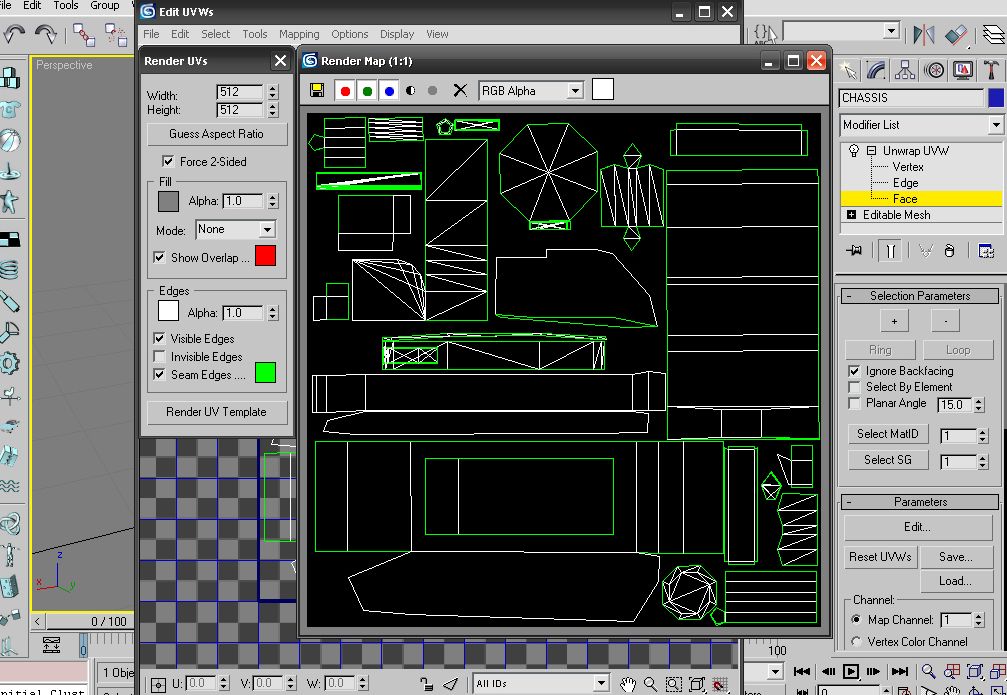
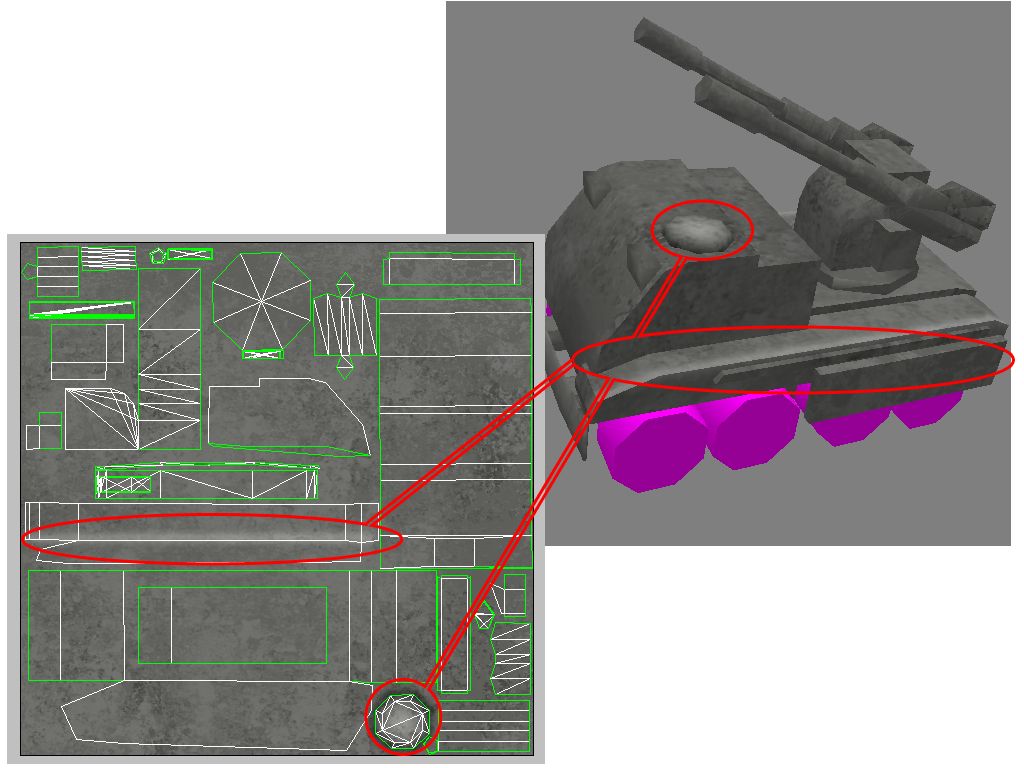
 Usually ZH unit models use 256x256 size texture for low detail unit skins, 512x512 for high detail unit skins and 1024x1024 for extra high detailed skins or just buildings. 512x512 is what Id recommend as it gives you plenty of room. Select "Render UV Template" and then select Save (the little floppy disc icon) and save it as .PNG to somewhere you can find it easily.
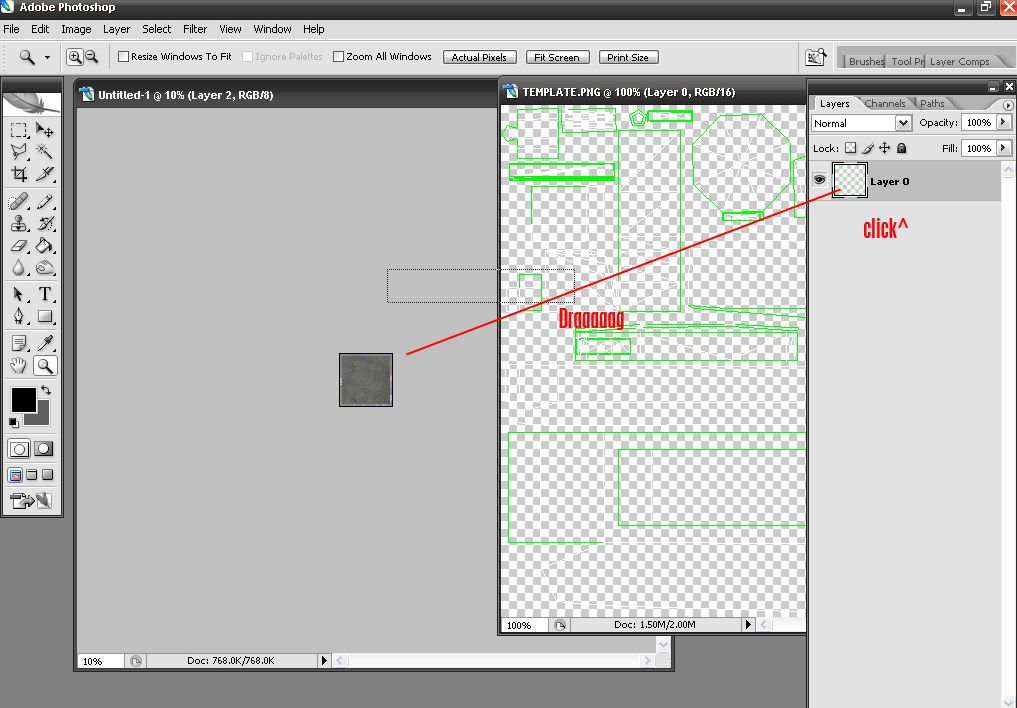
  Then attach a blank .tga file which is at the size you rendered your template at to your model and export to .w3d (or if you are using 3ds to preview your skin then dont bother exporting) Step 2 Okay thats it for 3ds max onward to actual skinning! Firstly you will need a nice base texture, you can learn how to do that in Bobs skinning tutorial On top of your base texture u will need your template, coz you will need to know exactly where to skin onto. You can do this by zooming out to 10% and dragging your template onto the .tga so it will come up in exactly the right spot
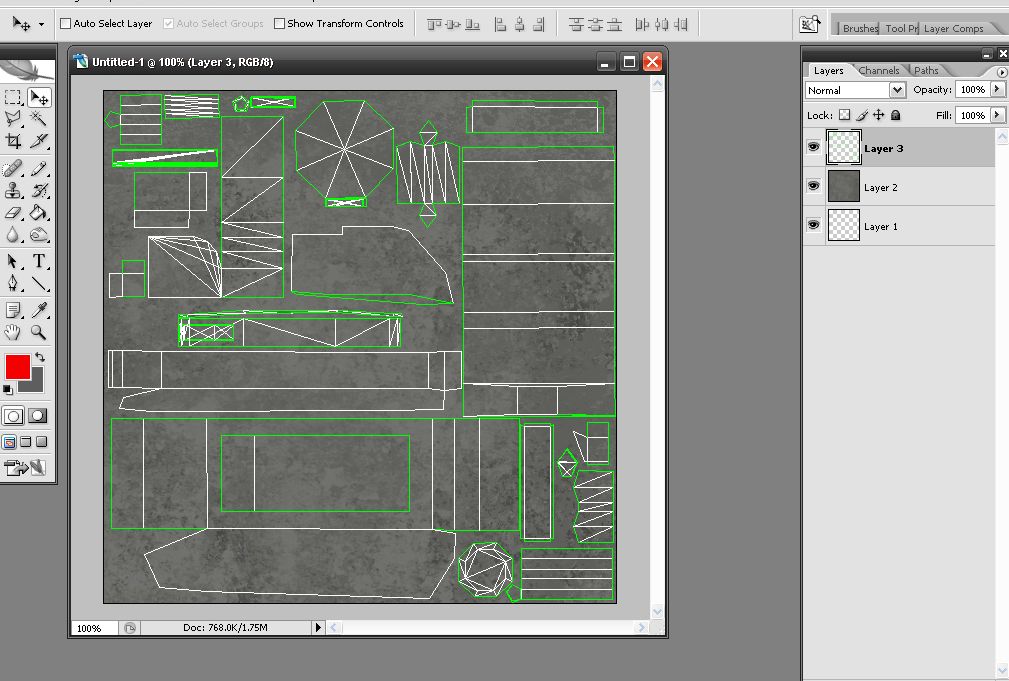
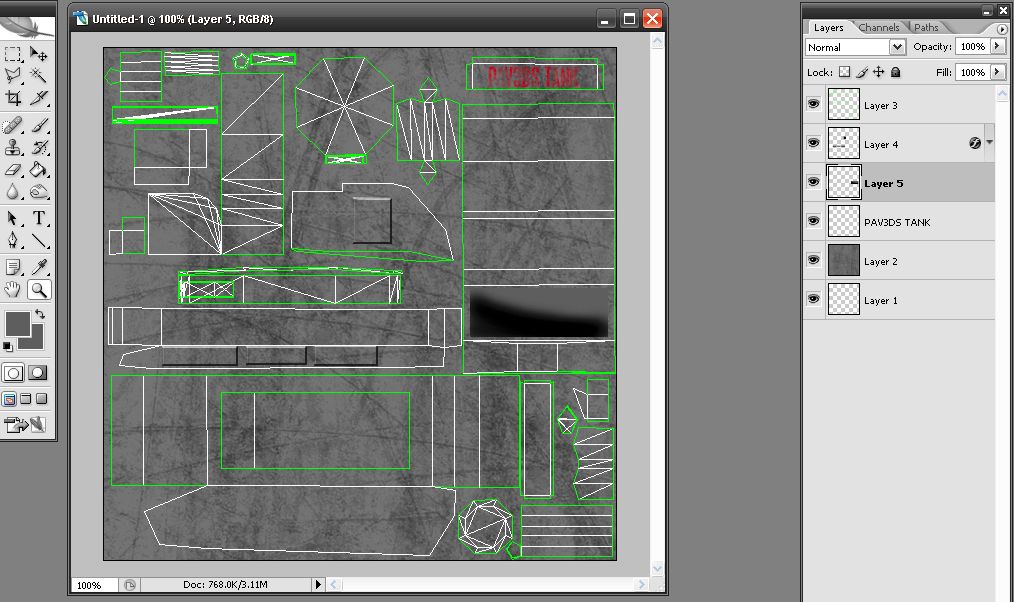
  You are now ready to start skinning, You should have something along the lines of this sitting infront of you now:
  Step 3 So where do you start? Just pick a place and apply these tips. Dodge/Burn This is without a doubt THE most important tool set to use when skinning. Take note of where it is coz you will not stop using it So youve got this rather boring skin infront of you, just plain blank, in order to bring areas up and exagratte them use dodge and burn
 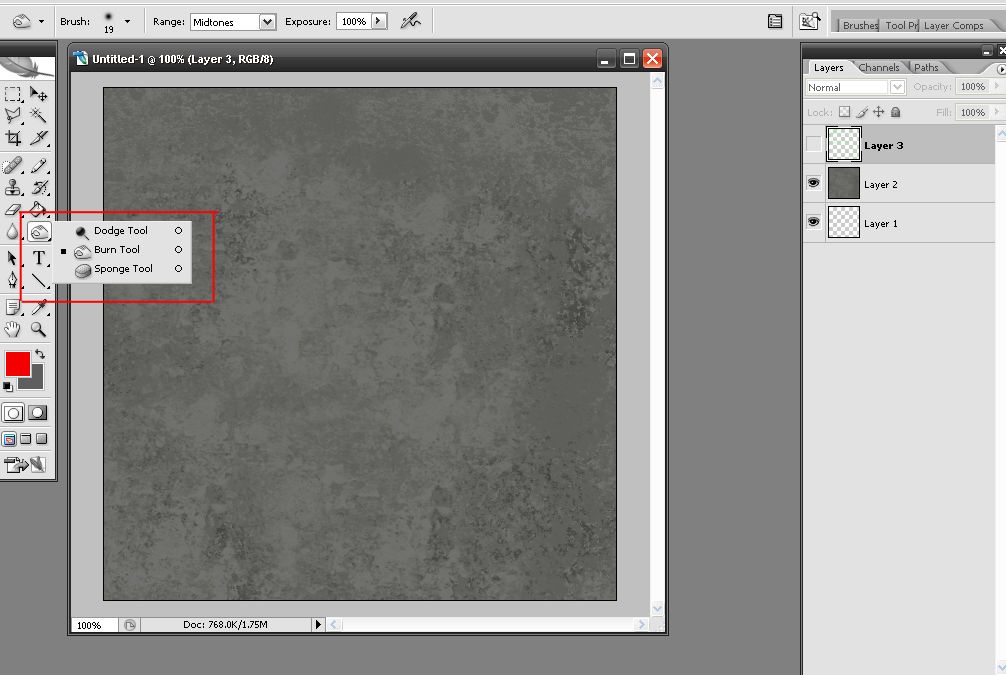 Usually I use dodging for any raised areas, and burning for any lower/darker areas and to create "flow" between different sections
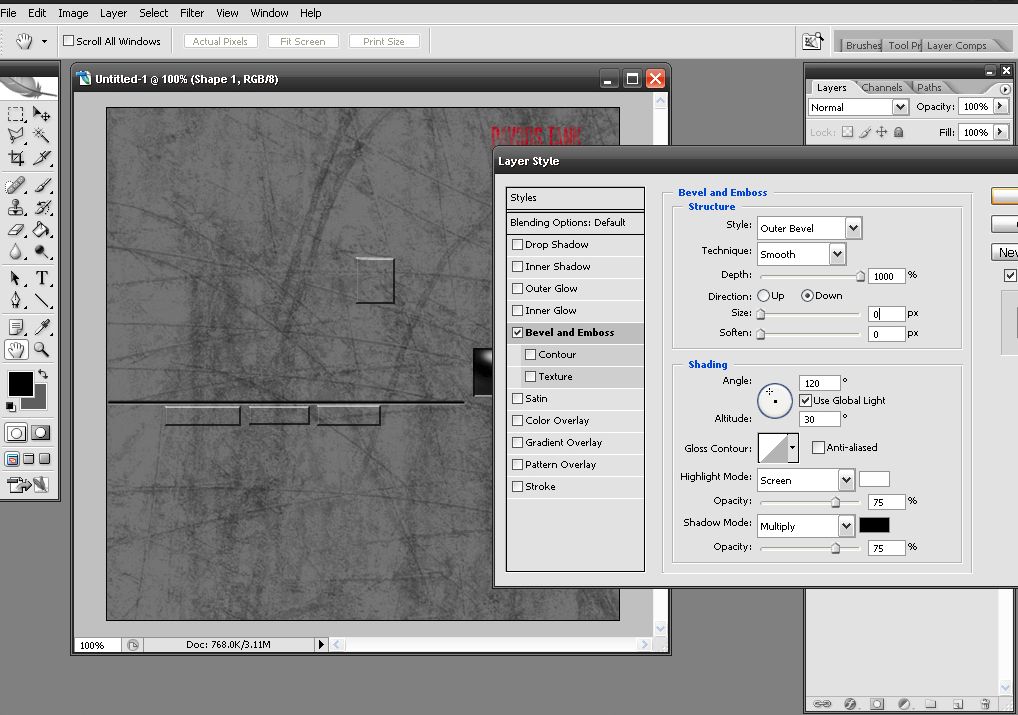
  Also it is wise to dodge onto edges as it will create a smooth joint on sides and ease up on the overall blocky look of the model Benevel/Embossing A fundamental tip to use in ZH skinning, can be used to add loads of detail, u will be suprised just how much its used in other skins. Try it out by making a simple square -> right click the layer-> blending options-> benevel and emboss with these settings:
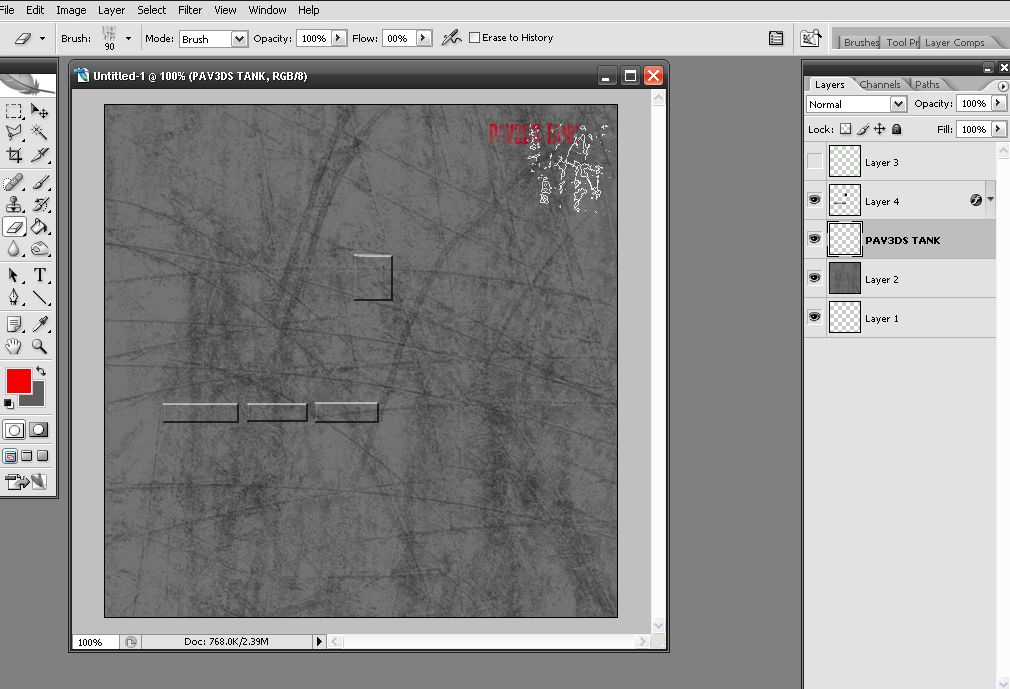
 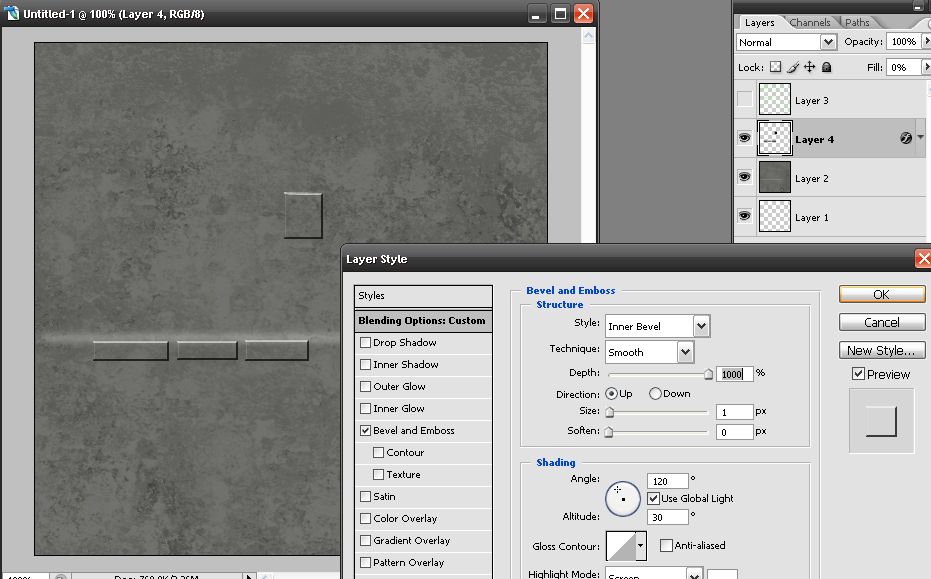 and there you have it, a sheet of armour plating or whatever. Try it with just a single pixel with a pencil tool but the emboss set to outer instead and there you have a screw. Do it with a circle instead and you have a hatch. You'll see its used in all ZH skins. Remeber to set the layer FILL (not opacity) to 0% so it will blend with ur base texture. Splatter Burning/Dodging So you want a gritty looking tank, but tanks are not just plain grey or plain green, they need some texture! This can be done like so: Select the Burn tool -> Select a splatter brush or scratches brush or some sort of texture brush, Im use a set of scratches brushes I found eons ago. Here is a set you can try out. And just apply it all over the texture, but not too sparingly and not too much. Again this is something you will need to try and try again to see what suits you. This is just a rough example, but with some splatter dodging thrown in Fading, Damaging Logos/Details These tanks/units/buildings are not from a museum, they are dirty and in a war so logos and paint will get faded and damaged. This simple effect can be achieved very easily Using your scratches brushes or any other texture brushes just start deleting some of the layer so you get sth like this:
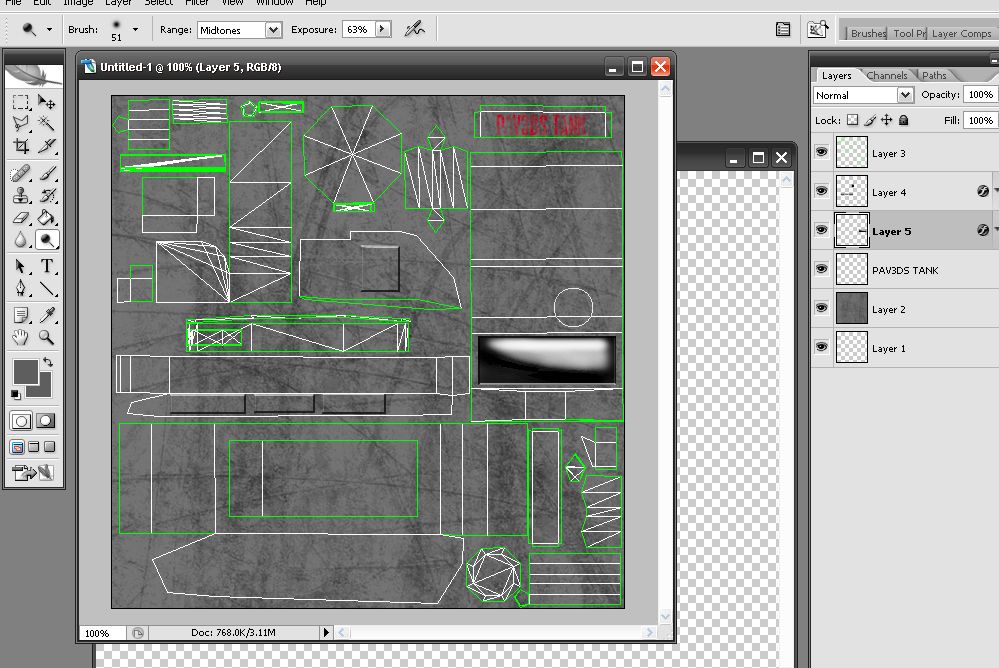
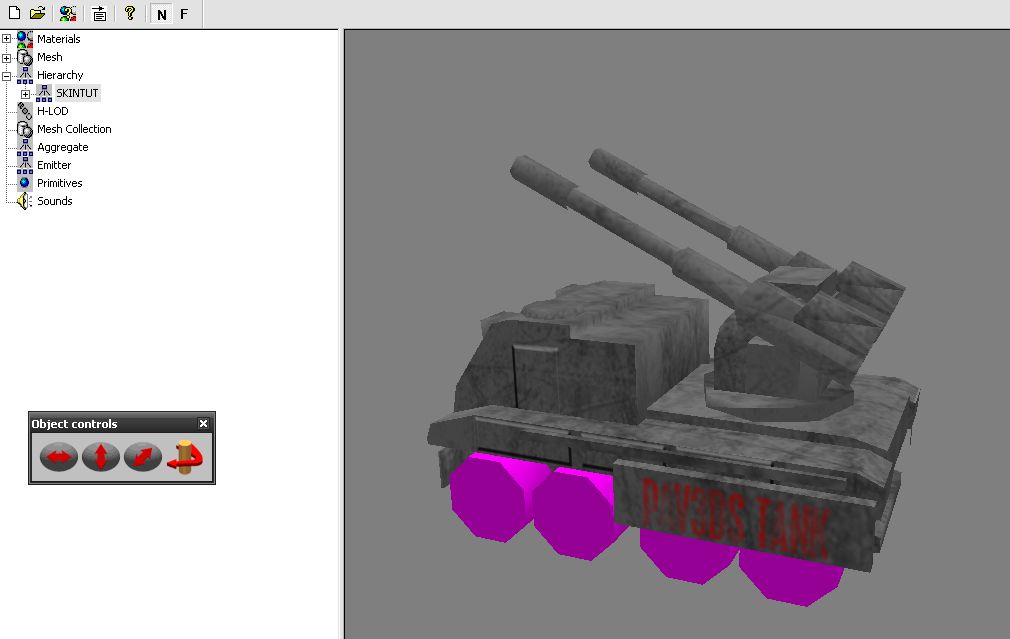 Windows Windows and glass in general is quite hard to get right, it relys on a heavy amount of use from the dodge/burn deparetment. Im just going for a basic black/white window here First fill and area with grey. Then start to darken the bottom and most of the middle, while lighten the top and edges. This takes alot of practise
  You can add some depth to your window by simply benevel and embossing the edges
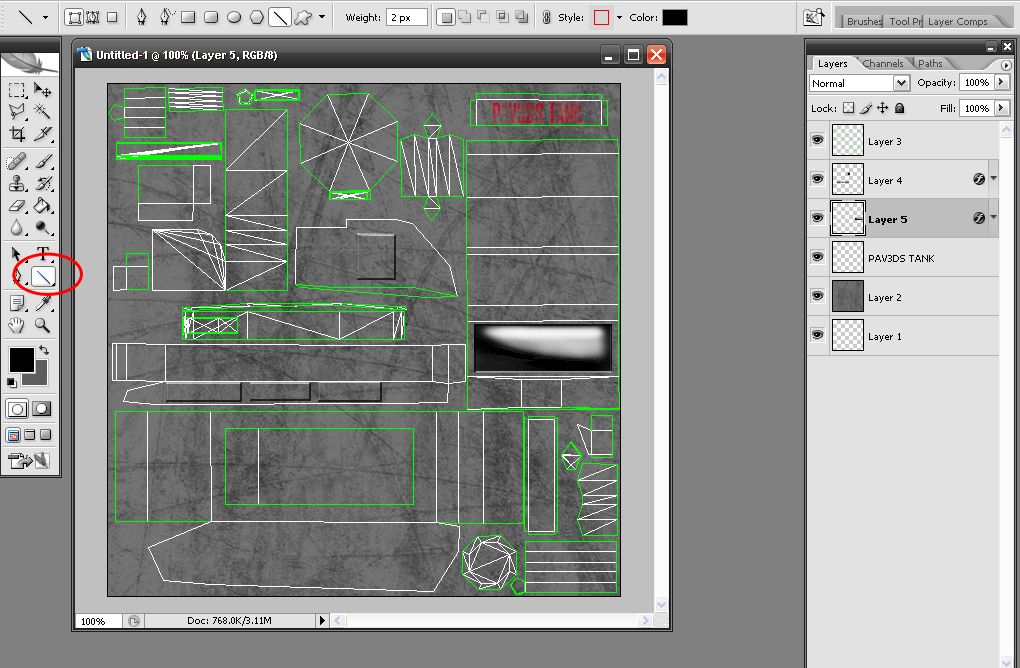
  Lines An obvious tip you might say but you will alwys need lines to represent different sections and split areas up and generally give it a more solid look. Select the line tool and outline an area, sure it wont look like much but when go to, thats right, benevel and motherfucking emboss it will look sunken in and like a gap between two parts.
 Try playing around with the embossed lines and you can make handrails, ladders, door handles etc. Sharpening In order to make your skin look more crisp and to show up details more, when u have finished just use this simple tip Open up your .tga (not your .psd) and go to Filter -> Sharpen -> Sharpen. Moving Treads You will need RenX OR change the material type in 3ds to .w3d (which is done by pressing "M" to bring up the materials menu -> "Material" from the toolbar -> "Change Material/Map Type" -> "W3D") Contrary to popular belief the treads in-game dont just move due to naming the tread meshes "TREADS01" or w/e, the actual material needs to be me messed with. You can find out all about that in this tutorial. Remember to follow the UV tiling part at the bottom, its very important! You will need to EITHER make your own tread texture (I recommend about 64x64px in size) OR you can just go ahead and use the NVTREADS.dds texture located inside the generals .bigs (every treaded unit in Zero Hour uses this texture On massively important thing they leave out is that which is left and right, it is always in correspondance to the tank facing you and your left and right, as shown here:
 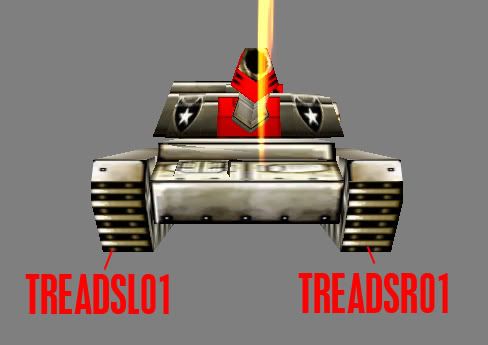 If theyre double tracked (Overlord style) Then its TREADSL02 and TREADSR02 on the rear ones So thats it, just practise practise. Hopefully your skins will turn out better than this ugly thing but Im not going to spend 3-4 hours making a new skin I aint gunna use style_emoticons/default/tounge.gif This is purely to show tips being applied. If I think of any other tips then Ill add them to it.
Edited by Pav:3d, 28 October 2011 - 14:33.


