Ok. I'm gonna make a thread to show off my work and for the experts to help out. i'm learning but i'm gonna need people's support.
This thread is gonna have my first models ever from scratch aside from the 'blob' i made a long time ago
I love Grafiti, and drawing. so i will post some as well.
i'm gonna start with something simple, a tank or somethin.

marc15yo's Art.
Started By marc15yo, Apr 01 2008 02:43
57 replies to this topic
#2
-
- Member
-

- 258 posts
Semi-Pro
Posted 04 April 2008 - 00:00
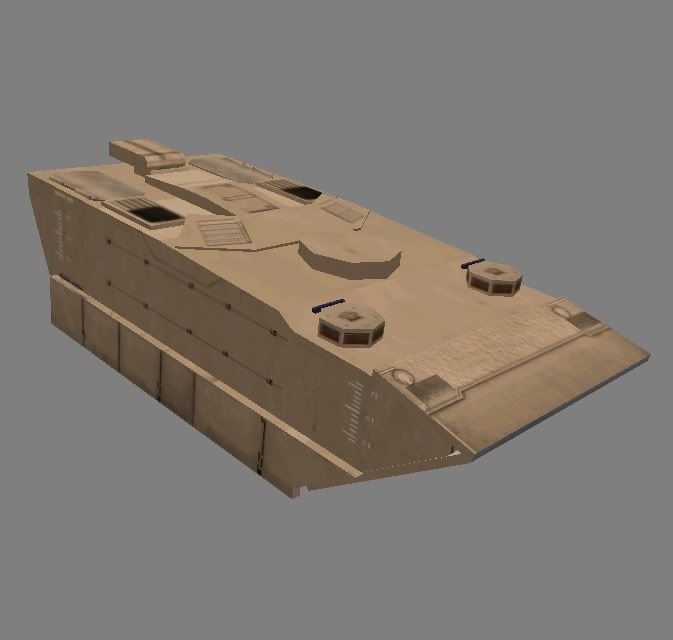
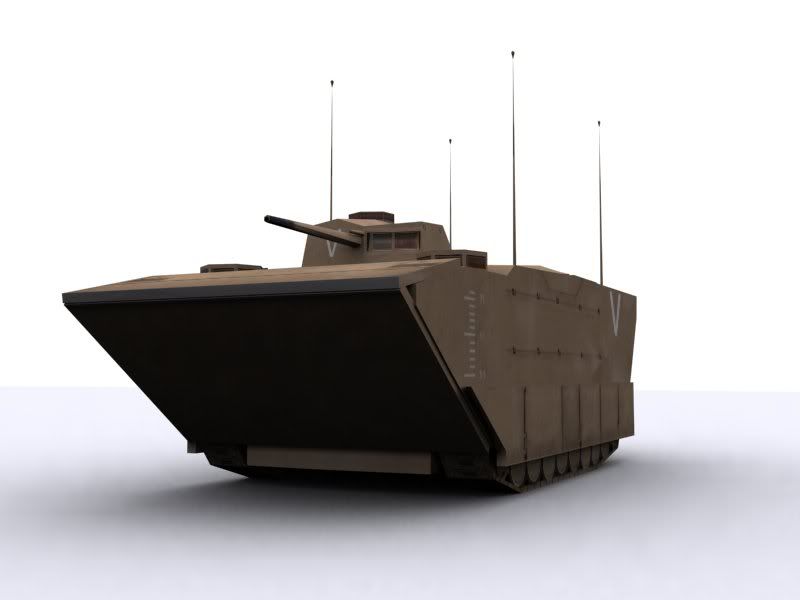
OK guys this is my first REAL model ever ever ever. i'm still working on it. i'm making the chassis first, i'm gonna add alot of detail to it. it's an EFV. expeditionary fighting vehicle. i thought it to be a good first model. and if it goes successful i might use it in my mod.
here is the real life version and this is where i'm getting all my info to model it as accurately as possible
http://www.globalsecurity.org/military/sys...d/aaav-pics.htm
and here us what it looks like up to yet.
what do u guys think. good start?
here is the real life version and this is where i'm getting all my info to model it as accurately as possible
http://www.globalsecurity.org/military/sys...d/aaav-pics.htm
and here us what it looks like up to yet.
what do u guys think. good start?
Edited by marc15yo, 06 April 2008 - 19:30.

#3
-
- Project Team
-

- 1611 posts
Cuboning!
-
Projects: Untitled, Generation X, March of the Cursed Reich (Working Title)
Posted 04 April 2008 - 00:19
it's quite good for a first model. Is the RL model that narrow though?
And also there's a vertex error on the front of the model you can see it in the 2nd pic. It looks like a shadow.
I've no idea what causes it or how to fix it.
it's quite good for a first model. Is the RL model that narrow though?
And also there's a vertex error on the front of the model you can see it in the 2nd pic. It looks like a shadow.
I've no idea what causes it or how to fix it.
And also there's a vertex error on the front of the model you can see it in the 2nd pic. It looks like a shadow.
I've no idea what causes it or how to fix it.
it's quite good for a first model. Is the RL model that narrow though?
And also there's a vertex error on the front of the model you can see it in the 2nd pic. It looks like a shadow.
I've no idea what causes it or how to fix it.

#4
-
- Member
-
- 258 posts
Semi-Pro
Posted 04 April 2008 - 11:50
yeah that annoying shadow thing. i tried to find out how to fix it but no luck.
i'm trying to get it as accurate as possible. i'm gonna try to make it less narrow. later on today i'm gonna add more detail.
i'm trying to get it as accurate as possible. i'm gonna try to make it less narrow. later on today i'm gonna add more detail.
#5
-
- Gold Member
-

- 7458 posts
Endless Sip
-
Projects: The End of Days, DTU Donutin Council Co-Chairman
Posted 04 April 2008 - 11:56
To fix the shadow glitch, select the model, go to Polygon or Face mode, select all the polys/face and at surface properties select clear all.
Since the RL thing is pretty symmetrical I suggest you cut the block in two halves length-wise, get rid of one, and then work on the one that's left. After you're done just clone-mirror the half you worked on
EDIT: After that don't forget to weld the two halves together!
Since the RL thing is pretty symmetrical I suggest you cut the block in two halves length-wise, get rid of one, and then work on the one that's left. After you're done just clone-mirror the half you worked on
EDIT: After that don't forget to weld the two halves together!
Edited by Waris, 04 April 2008 - 11:57.
#6
-
- Member
-
- 258 posts
Semi-Pro
Posted 04 April 2008 - 11:59
oh sweet.
about the cloning thing. i guess it's a good idea, i had thought of that b4. i'll do it but in case i will make a backup.
also on the bottom of the model is it possible to like 'carve' in the tread area or space. because the rl one has the treads on the inside.
about the cloning thing. i guess it's a good idea, i had thought of that b4. i'll do it but in case i will make a backup.
also on the bottom of the model is it possible to like 'carve' in the tread area or space. because the rl one has the treads on the inside.
#7
-
- Gold Member
-
- 7458 posts
Endless Sip
-
Projects: The End of Days, DTU Donutin Council Co-Chairman
Posted 04 April 2008 - 12:35
You don't really have to 'cave in' the bottom section of the chassis because if you look closely at the RL thing the treads are covered on the outside by armour plating. Just do like what you dd on the back area of the chassis.
#9
-
- Project Team
-
- 2351 posts
girl eater
Posted 04 April 2008 - 19:21
it's ok for a first try, but you really have to focus on some basic things. like now, your chassis is ok but i see some assymetrical parts as well as a weird thing sticking out on the front. symmetry will almost always make the model look nice, at least IMO... keep practicing alot and you will surprise yourself one day!
Edited by ka1000, 04 April 2008 - 19:22.
it's time to wake up
#10
-
- Member
-
- 258 posts
Semi-Pro
Posted 04 April 2008 - 21:32
nice, thankyou. soo much guys. i just updated it a littlebit. i'm getting really excited.
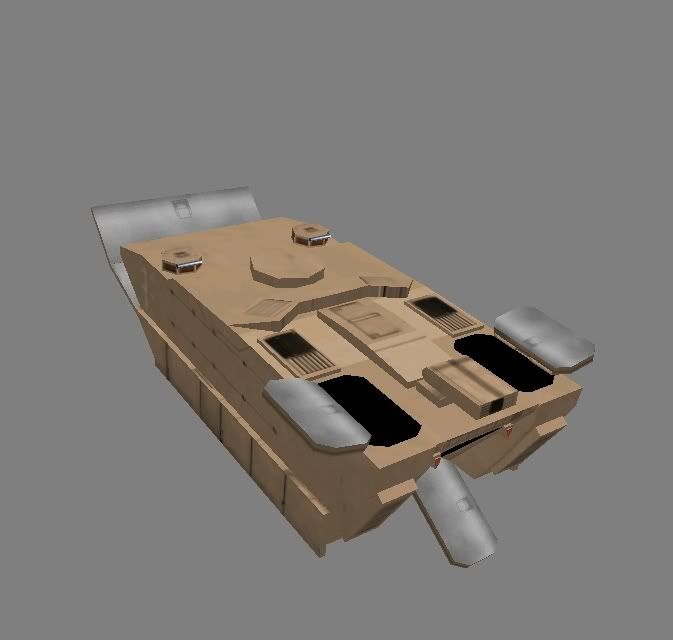
now u guys can see i tried as much as i could to add detail. using all the views and images i could find. i've come up with this.
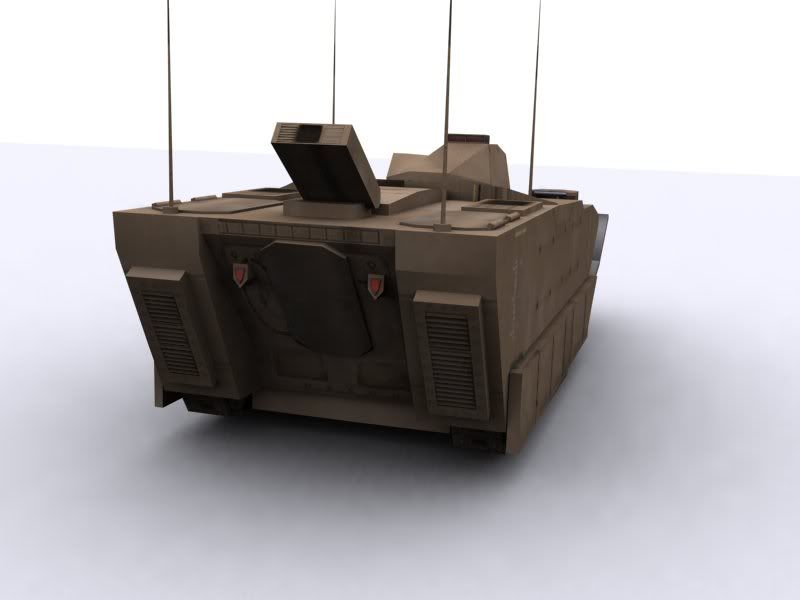
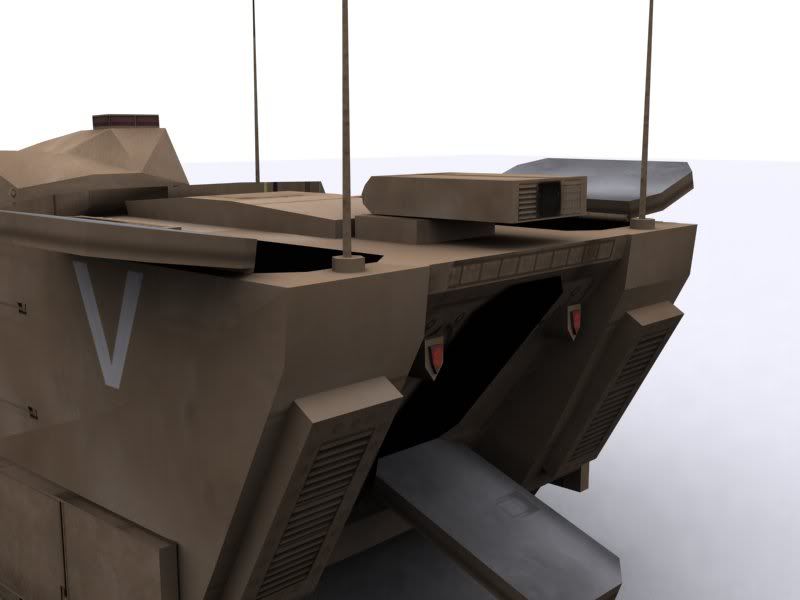
i added door hatches in the cargo compartment. with an animation. soldiers will be able to pop out and engage targets on their own if necessary in-game.
EDIT: removed pics
now u guys can see i tried as much as i could to add detail. using all the views and images i could find. i've come up with this.
i added door hatches in the cargo compartment. with an animation. soldiers will be able to pop out and engage targets on their own if necessary in-game.
EDIT: removed pics
Edited by marc15yo, 06 April 2008 - 19:30.
#11
-
- Member
-
- 1178 posts
rawr!!
-
Projects: Being more loved and less loathed by community

#13
-
- Member
-
- 258 posts
Semi-Pro
Posted 06 April 2008 - 15:54
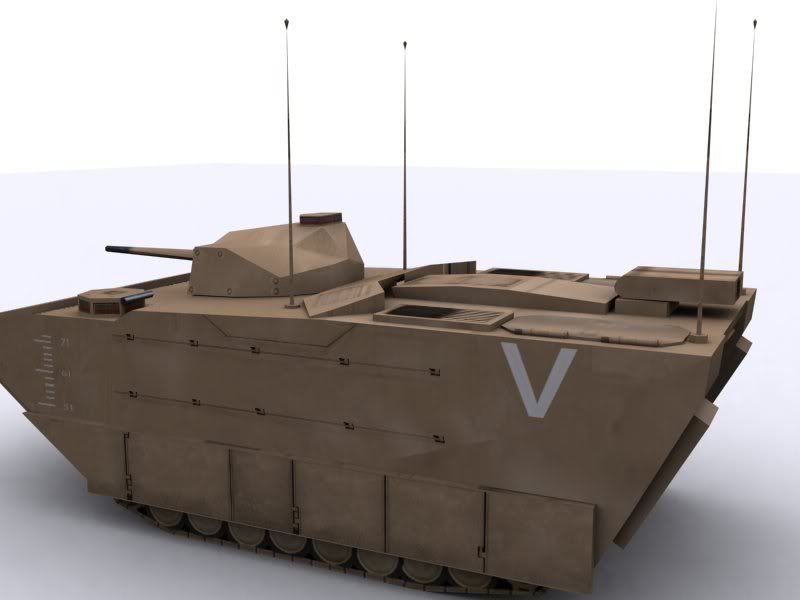
OK guys. i finished the chassis. it's completely redone with animation for the high speed water mode. Now i'm gonna work on the turret. then the skin and the a render.
yeah it's alot of images but oh well
yeah it's alot of images but oh well
Edited by marc15yo, 07 April 2008 - 02:22.
#14
-
- Member
-
- 1870 posts
America's Rage Leader
-
Projects: Americas Rage
Posted 06 April 2008 - 16:43
 very nice
#16
-
- Gold Member
-
- 7458 posts
Endless Sip
-
Projects: The End of Days, DTU Donutin Council Co-Chairman
Posted 06 April 2008 - 16:45
iApprove. 
Just one question, where are the treads?
Just one question, where are the treads?
#17
-
- Member
-
- 258 posts
Semi-Pro
Posted 06 April 2008 - 16:48
thanks bro. gonna make them soon. i was focusing on the main chassis first.
#18
-
- Project Team
-
- 2351 posts
girl eater
Posted 06 April 2008 - 18:55
man, try to compensate on the pictures a bit, even i never posted so much.... try to get that view that's split in four so you can see everything at once and you dont have to post such a humongous load of pictures that swallow bandwidth like hamburgers.
it's time to wake up
#19
-
- Member
-
- 258 posts
Semi-Pro
Posted 06 April 2008 - 19:29
lol ok, i'm gonna edit my posts and remove the other old ones.
#20
-
- Member
-
- 258 posts
Semi-Pro
Posted 07 April 2008 - 02:26
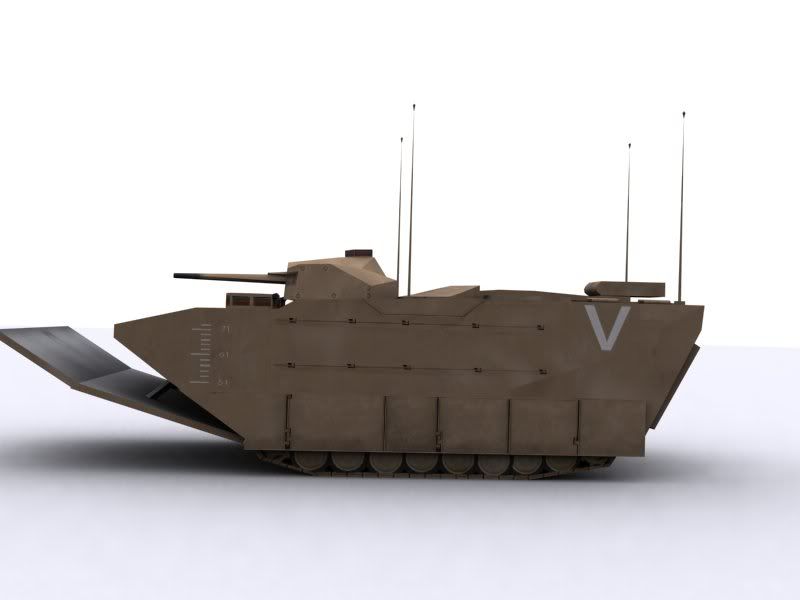
Ok so i updated the chassis again even though i said it was gonna be final. i wanted to make it perfect. so NOW it's safe to say the model AND skin of the chassis have been completed. i've been working on it all day long. i'm starting to fall in love with it. i've been doing soo much work with gmax and photoshop lately and then it just hit me, modeling and skinning is starting to be less complicated then coding. (well to me it is)
Edited by marc15yo, 17 April 2008 - 15:07.
#21
-
- Gold Member
-
- 7458 posts
Endless Sip
-
Projects: The End of Days, DTU Donutin Council Co-Chairman
Posted 07 April 2008 - 03:01
Brilliant stuff. Top notch. Yadda. Can't wait the final product 
#22
-
- Project Team
-
- 2351 posts
girl eater
Posted 07 April 2008 - 10:03
good, good! but you might try to work on that skin a little, right now it looks too flat IMO. give it more depth by giving it highlights or shadowing on keyspots.
it's time to wake up
#23
-
- Member
-
- 258 posts
Semi-Pro
Posted 07 April 2008 - 14:52
yeah yeah good idea. oh and thankyou.
does anyone know how to make the uvmapping map thing into an image file, that way i could like pait over the uv's, instead of having to make the skin first. cuz sometimes the skin i make dosn't seem to fit the model.
does anyone know how to make the uvmapping map thing into an image file, that way i could like pait over the uv's, instead of having to make the skin first. cuz sometimes the skin i make dosn't seem to fit the model.
#24
-
- Member
-
- 258 posts
Semi-Pro
Posted 17 April 2008 - 15:06
OK guys I finally Finished the EFV model and the EFV Desert Skin. All i have to do is make the snow skins and the woodland skins and i'm done with it. it turned out really really good. =) I was going to make the sights on the turret carved inward like the real one but i couldn't figure out how + i didn't want to screw up the turret model which was really confusing. I Pimped up the skin and followed ka1000's advice.
Edited by marc15yo, 17 April 2008 - 15:07.
#25
-
- Member Test
-
- 898 posts
The one who screams.
-
Projects: Nothin'
Posted 17 April 2008 - 15:07
Thats nice


1 user(s) are reading this topic
0 members, 1 guests, 0 anonymous users

